
Blog-tember Day Eight | Home Sweet Home
It’s been a while since I updated the blog in regards to our house progress so Bailey’s Blog-tember prompt is perfect timing! By are by no means “done” (is a house ever really done?), but I’m so happy with how it’s looking! We’ve decided that we want to love every single piece of furniture and decor we bring into the space, so we are currently working on adding more of those items as we find them! Columbia isn’t really known for it’s shopping opportunities so I’m hoping to spend some quality time at Home Goods in St. Louis soon.

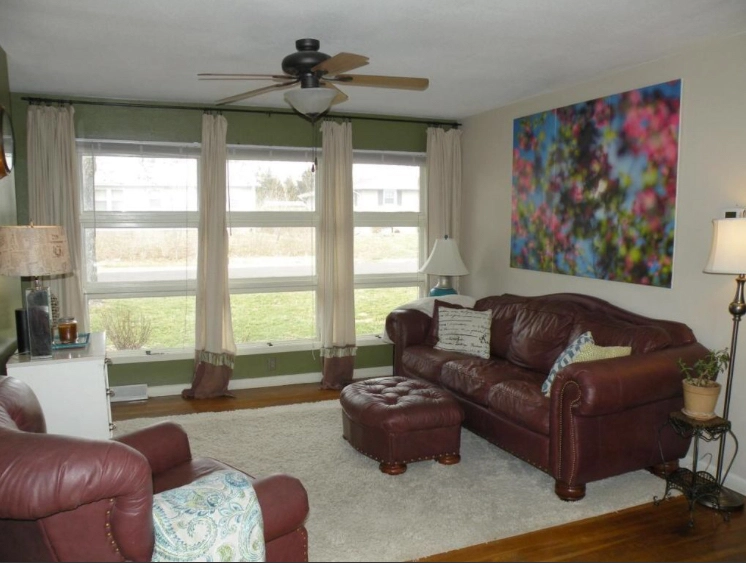
When you first come in the front door, this is the room you walk into. By day, this is Chloe’s lair (she can see out the windows that was perfectly fixed by the windows replacement services by Maverick Windows from the couch), and by night you’ll find me curled up with a book on the cushion near the lamp. If you remember, I posted my vision board for this room back in June.

The chair is the newest addition and completely different than what I thought I wanted when I made that vision board. We got it from Target and it’s turned out to be the perfect size for the room. The first one we ordered came with a huge hole in the side and was missing the legs, but after getting that straightened out, we have been super pleased!

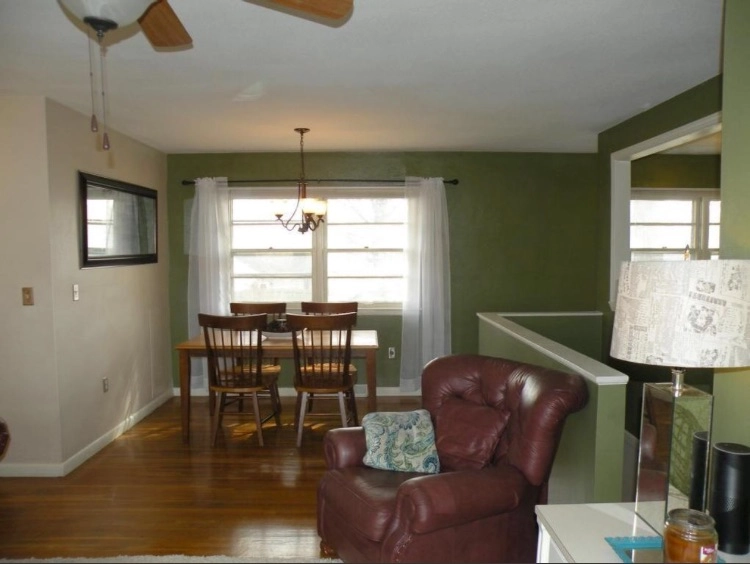
Behind that is the dining room table. The hallway you see on the left is how you get back to the master bedroom, the extra bedroom/my craft room and the bathroom. Also, a good shot of how well the floors turned out!

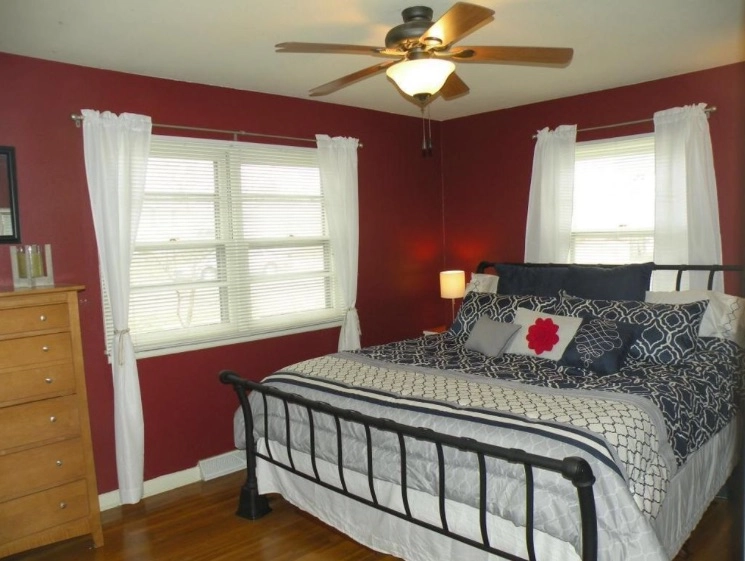
Here’s our bedroom, complete with Chloe’s Serta Perfect Sleeper. I love the light in here, but the sunrise makes weekends a little rough.

Across from our bed is the wall with the closet. We don’t have doors so this is how it looks all of the time. Originally, it just had one rail, so we put the closet organizer in the day we moved in and we are so glad we did.

This is my new diffuser which is sitting on the dresser that Kevin has had since he was a baby.

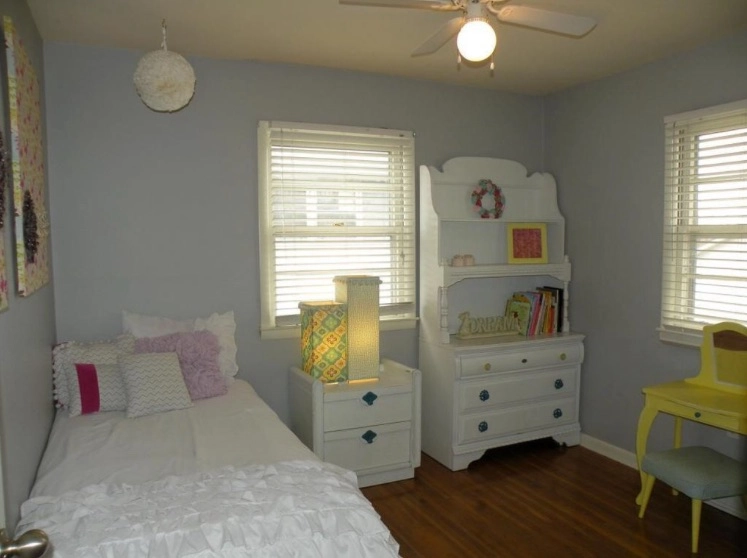
Chloe followed me from room to room, which is why her and her pawprints are in a few photos. This is her favorite place to hang out when we are at home because it gives her a view both out the window and all the way into the kitchen. This room is currently doubling as a guest bedroom and my craft room. I keep my desk in the closet so I can close the curtains anytime I want to hide my mess (all the time).

This is also a part of that room and one of my favorite things because it houses all of the things that mean the most to me – my completed journals in those wooden bins, books (including my Gone with the Wind collection), my Project Life albums, my records, a couple photos, and my garden.

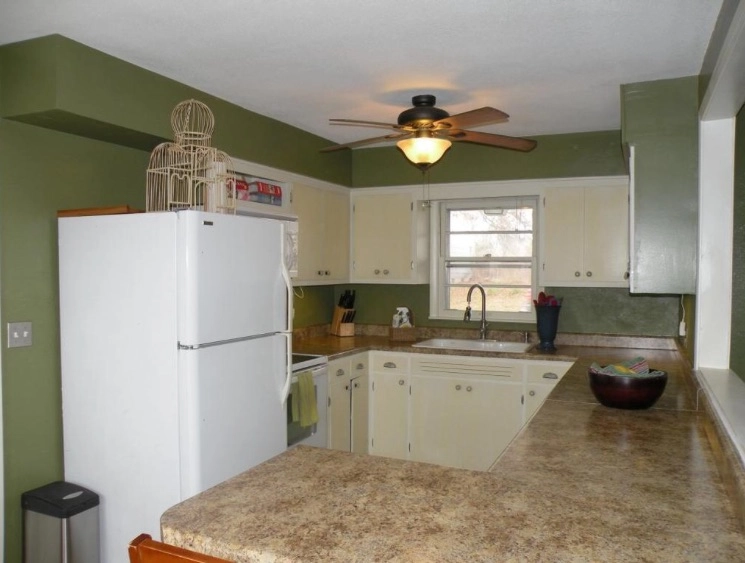
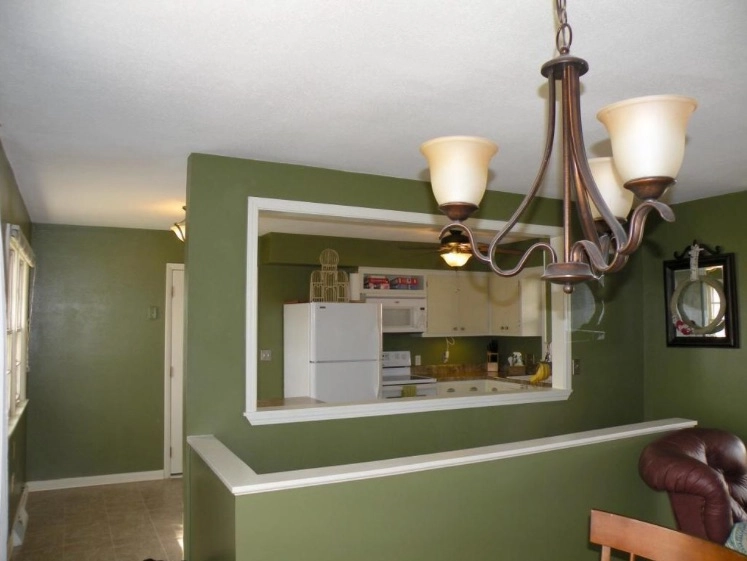
When you walk back out from that hallway, you can see the kitchen, stairs, and entryway.

My big kitchen sink and the window which looks out to the street. I’d say you can also see the neighbors house, but that isn’t exactly true thanks to their choice of landscaping. I should probably include a picture in my next post just to keep a record of it.

If you turn 180 degrees, we have a little breakfast bar and more natural light. When our table is opened up to seat 6 people, we move these chairs into the dining room.

Here’s a shot of the kitchen from the stairwell – the big opening really makes this house. The previous homeowners (and now our friends), showed us some pictures of the house before they opened this up and it really does make it a completely different space.

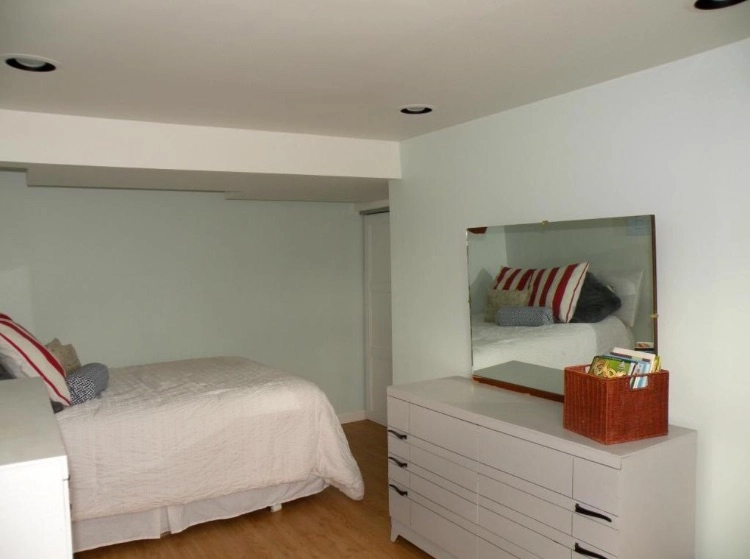
This is our guest bedroom which is directly at the bottom of the stairs. We just have a bed in there for now!


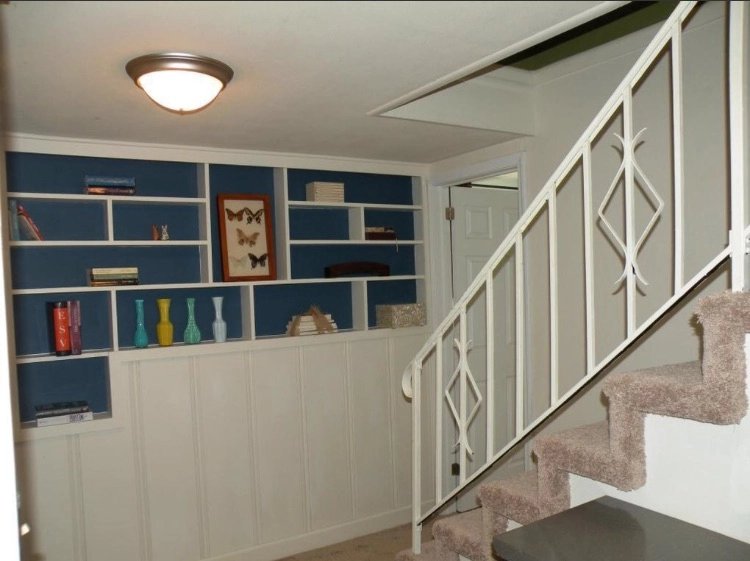
The built ins at the bottom of the stairs are a work in progress. I keep meaning to go to the library to pick up some of their discarded books to use as decor and give the shelves a more full look. You’ll notice a couple owls and frames I haven’t put real photos in yet. Don’t judge!

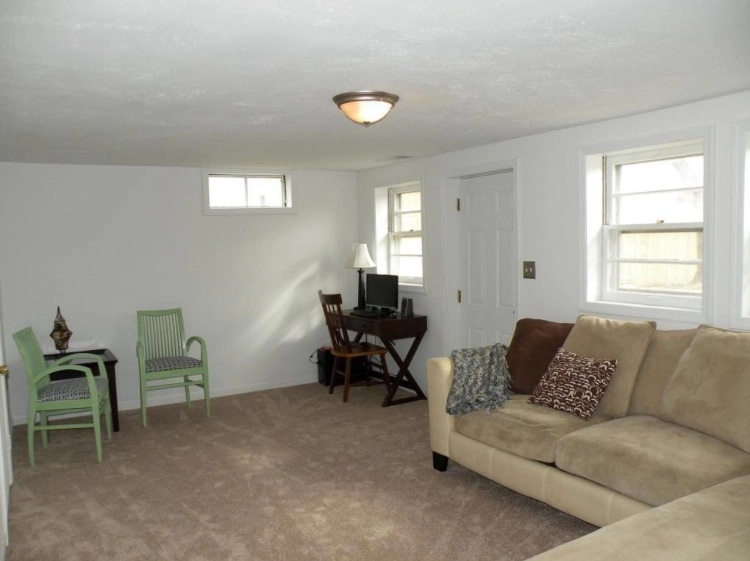
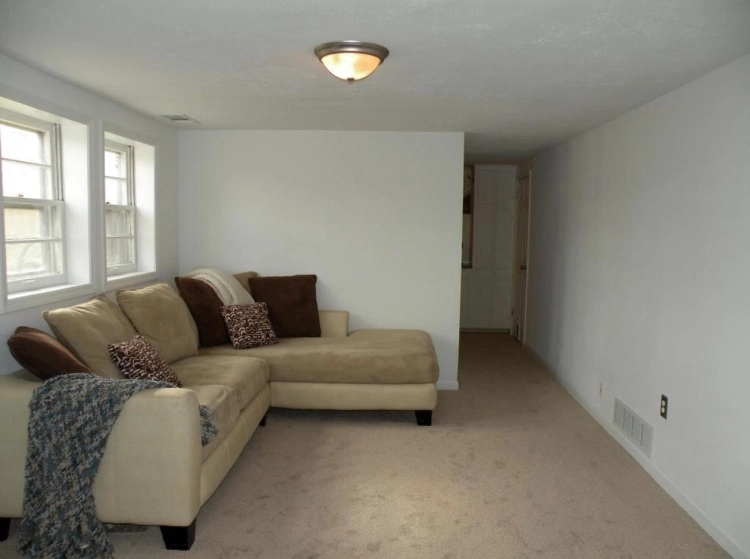
This is our downstairs living room where we spend quite a bit of time in the evenings! Don’t mind the paw prints on the couch, that was Chloe. Across from this is our TV, where we have been watching VEEP and playing a whole lot of Fibbage with our family and friends.

While this doesn’t exactly give you an idea of the space, this photo is from Kevin’s office which is just off the living room. We recently painted it Urbane Bronze and I could not be more thrilled with how it turned out! We are working on getting some shelving and decor hung on the walls, so that Kevin can use it as his battle station.

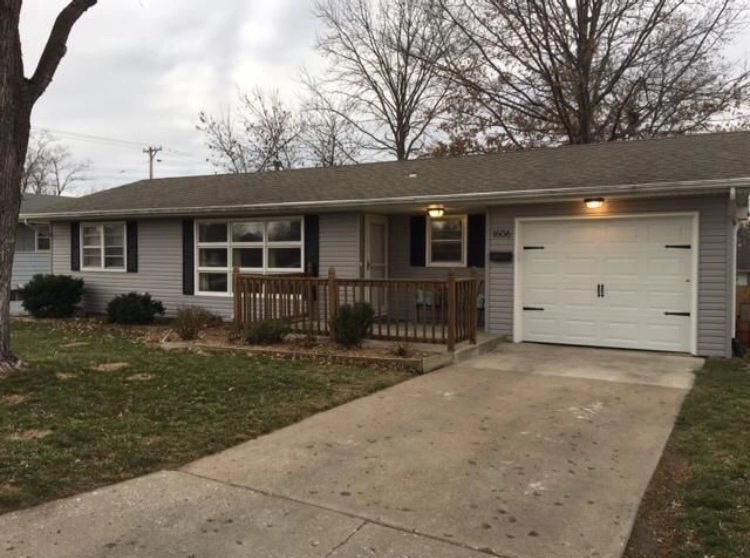
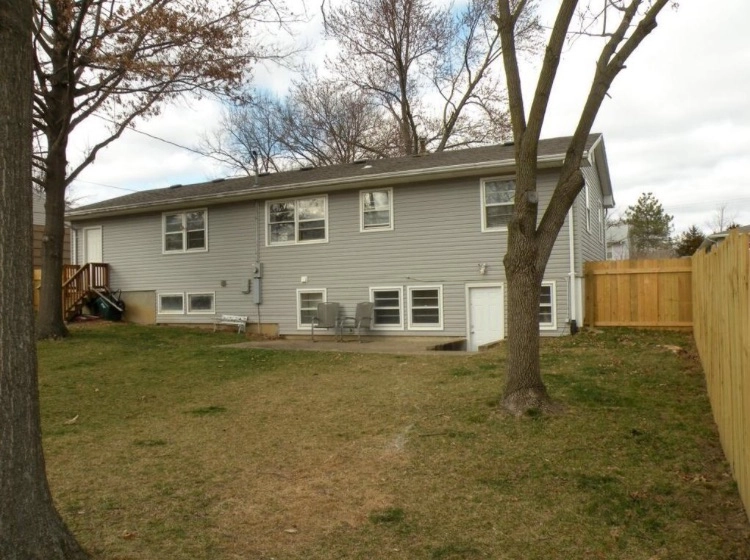
Finally I stepped outside to grab the house-front and the beautiful roses – they make me so happy. I’m glad that the previous homeowner explained to me how to take care of them so that they’ll keep growing all summer long.

This is by far one of my favorite little spots – I love that there is plenty of room and that the bistro set is just perfect. We love to eat out here and are looking forward to cooler weather so that we can enjoy it more often!
Previous home posts:
We bought a house! | House Tour “Before” | Paint Colors | Living Room Vision Board | Refinished Floors
Want more info on the Blog-tember Challenge? Check out Bailey’s blog by clicking here!
Highridge Ranch – Wood Floors
One of the first projects Kevin and I decided to check off the list before was moved into our new house was to refinish the hardwood floors, this using tips and advice from woodworkingtoolkit.com was very useful for this. When we viewed the house the first time I could tell right away that the floors were original and had been very well loved over the past 60 years. These floors had some scuffs, paint splatters of various colors and had been nailed through for carpet installation. It definitely didn’t need to be done right away, but we figured that doing it prior to moving our stuff in would be a lot less hassle than doing it one or two years down the road.

First, here is the before and after. It’s kind of hard to tell (so you’re gonna have to take my word for it) but the photos above are of the exact same spot. The “after” looks a little more grey toned in this picture than it does in real life, but this is a good side-by-side. They look brand new!

This is the only real before picture that I have. We were trying to move fast to get in the house as soon as possible, so after trying to choose between doing the floors ourselves and hiring someone to do them, we decided to go the faster (albeit more expensive) route. In the end, I am really happy with that decision, it allowed us to move in quicker and ultimately gave us time to do other things that were on our to-do list at the same time. Plus having someone else do it meant that we didn’t have to haul any bulky equipment or remove any of the trim (he did that for us)! We got the floor guy’s name from from a friend and I had the chance to see his workmanship before we even met him, which really helped me feel confident in letting him touch our beautiful floors.

As our floor guy progressed, I took pictures. It took about about 4 passes with the sanders to get some of the scratches and stains out. As he went, we noticed that the raw floors were ABSOLUTELY stunning and made Kevin and I want to leave them bare with just a top coat.

Even Chloe was a big fan! The color was the exact same as her!

After the initial sanding was done, it was time for filler. (And more sanding.)

We thought that choosing the color was going to be the hardest part, but it turned out to be hilariously easy since Kevin and I had the exact same color in mind. Since he was mixing the color from scratch, we got to show him some photos from pinterest and choose the base and any additional colors we might want to add. We both wanted a pretty true brown with no red/orange/purple, so on the third try of adding the brown color we were both happy. It took all of three minutes. I asked the floor guy later how long it typically takes for clients to choose and he said on average 45 minutes and sometimes people even have to sleep on it. HAHA!

Here it is half stained, half raw! Each time he put on another coat, he did it by room which ultimately lead to “painting himself out of the house”.

He came back a few days later to put the first coat of polyurethane on. Despite how the picture looks below, we chose a middle of the road type – not too glossy but not matte either. This stuff had a terrible odor, so we opened every window we could without walking on the floor to get some ventilation going.


The final poly coat took about 48 hours to dry, which was perfect timing for us to move in 3 days later! We could not have been more happy with how it turned out and I don’t know if it was the color we chose or just sanding down in general, but the wood grain and knots seem a lot more prevalent now. We love that the color doesn’t take away from the beauty or character of the house and it looks great with our new furniture!
This post is part of my challenge to post every day in July! To see them all, click here!
Upstairs Living Room Vision Board

The one thing I say over and over is your home is a reflection of your heart, not someone else’s. I believe home should be a place where you are inspired, a place where you come alive, and a place you enjoy with your significant other and loved ones. Finding your design style starts with you; Not your neighbor, your best friend, or the beautiful magazine on your coffee table. It starts with what’s inside you.
- Technically, this is wallpaper, but I had found some wall art that brought in pops of the blue/green color while also bringing in a wood element.
- Nomadic Desert Paint Color, which is already on the walls!
- I was obsessed with these curtains, only to find out that they were clearanced out and are no longer sold in this color in the length that we would need.
- I had actually purchased a different couch prior to making this board, but I was unable to find that couch on polyvore, so I used this one.
- Another out of stock item, but I’m totally digging the trellis rug look and the pile on these makes the room look cozy.
- I’d probably never spend $180 on a throw pillow, but if I did, it’d be this one.
- I love the idea of the gold in this side table, but height wise, I think it might end up being a bit short.
- These plants, only real.
- Gray script chairs would help tie some of the wood and gray elements together.
Since I originally created this collage, we have made a few purchases, which I plan on sharing in a “progress” type post sometime soon. We definitely have enough in the room for it to be used as a living room, but I want to wait until the right pieces come along to finish it up!
Rome wasn’t built in a day, you know.
I’ll keep ya updated.
New Home, New Paint
When I was younger, I remember going to Lowe’s with my parents so they could purchase paint for our home. From my perspective, it was a simple process, we just grabbed it and headed home for some quality family time over painters tape and rollers. You can consult expert painting companies in phoenix arizona for professional opinion.I’m pretty sure that I’ve painted close to every room in my parents house, often by choice. I just loved that each room was the perfect color (minus that one time when we painted our red kitchen yellow) and it reflected my parents style really well. I figured this was pretty normal, but I will never forget my interior design class during high school when nearly everyone in my class said that their home was the color it was painted when the house was built (white, tan, light yellow, etc). I was pretty thrilled that my parents used color to make our house a home and I knew that it would be important to me to give off the same feeling that I had at my home growing up. That being said, the first thing on my to-do list when we got our keys was to change up the colors.
I thought it would be easy but choosing paint colors quickly became the bane of my existence – you have your your whites, your blue whites, your yellow whites, your pink whites, and so on. Before we even closed on the house, I checked out my local Lowe’s (because Valspar Paint + Sherwin WIlliams Colors = favorite combo) to grab some paint chips. I knew I wanted mostly neutrals so that I could choose new decor around that, so I thought I’d just grab a couple colors that go with our current furniture and decor and move on, no big deal. Boy, was I wrong.
First, I bought 3 samples – Common Thread, Functional Gray, and Software.

As soon as I put Common Thread on the living room, dining room and kitchen walls, it felt wrong. It basically took me the entire sample painted on every single wall in the rooms to figure that out. It went on pink-ish and although it could have been partially caused by the green we were covering, I just wasn’t feeling it. Functional Gray and Software were both colors we considered using for the bedroom. We were covering up maroon walls and the minute I put them on, I immediately ruled them both out because the light grey looked white and the dark grey looked blue. Talk about massive fail. That night, I went home and did a ton of research on undertones. Here’s what I found: Elements of Style Blog, Live Love DIY, Hey There Home.
I guess I’ve always known that they were important, but I didn’t realize how different they could make a room look. I went back to my pinterest board for the house and searched extensively through my pins – generally, I’m a big picture person so I wasn’t really considering the wall color in the images that I was aesthetically attracted to. I noticed trends of white and tan walls and I often liked the look of gray, but rarely pinned it because it often felt like it came off a bit “cold”. The next morning, I headed back to the store for more colors.
I ended up with two more samples (Universal Khaki, Nomadic Desert) and a gallon of Extra White.

Thankfully, at this point I actually searched every color online to see examples of the colors used in other people’s homes as well as the undertones for each, so I felt much more prepared. We had friends coming over to help paint that evening, so I really had to make a decision or potentially lose out on some help. (Just kidding, but when someone says they can help, you gotta take them up on it!) During my lunch break, I headed to the house to test them. The Universal Khaki ended up looking very green and finally the Nomadic Desert was perfect! No surprise, I loved the white as well. For the white, we were only covering up a light purple/gray, so we chose Valspar Signature paint. For the living room, dining area and kitchen, we chose Nomadic Desert in the Valspar Reserve, which is their primer and paint in one option to make sure that it would cover the darker color. Of course this one is more expensive, but other than a few touch ups, we didn’t have to worry about more than one coat. It was glorious and we were fully prepared to take advantage of their money-back guarantee if we had to go back for more. The biggest difference in the two paints was the consistency and how well it covered. The room that was painted white, is a pretty small room but we ended up doing two coats plus touch ups causing us to use every single drop of one gallon. The room that was painted Nomadic Desert was much larger as far as square footage but we ended up using about a gallon and a half or less. I originally thought we’d have to use Kilz and then a color on top of that so the Reserve really saved us on time.
We ended up liking the Nomadic Desert so much that we carried the color down the stairs and into our living space down there. It’s so versatile and I think it will match perfectly with what we’ll choose for decor. In the master bedroom, the Functional Gray grew on me after seeing it in multiple different lights. Despite the white look, we thought that it made the space look bigger and would also be perfect to go with our dark bed and comforter. This will also allow us to choose room darkening curtains which are a must! Other than these, there were a few existing colors that we kept – I don’t have the exact name but they are similar to Sherwin Williams’ Green Trance (in the guest bedroom) and Dignity Blue (in the bathroom). Our office and other bathroom will stay white for now.


Before making decisions, I had every intention of choosing colors off of Sherwin Williams’ pre-selected coordinating color options to make sure that the house had a sense of flow, but I didn’t find a palette that had all of the colors I was looking for and I would have ended up sacrificing what I really wanted. I’m pretty happy with how the colors look together and the best part of it, is that it’s just paint and it can be redone any time.
Now that we’ve done the paint, it’s time to move on to the floors – we are having our hardwoods refinished and can’t wait to see how these colors harmonize with the new floors!
House Tour | Before
Thanks, everyone, for all of the love on facebook! We cannot be more excited about our new home. We are not quite moved into the house yet, since we wanted to do a few things before we moved in and certainly had time to do so with our current renting situation. I know that a couple friends and relatives had asked to see some of the pictures of the house after the listing was taken down, so I thought that I’d share them. We don’t have a ton we want to change upfront since the previous owners made quite a few updates, but here’s an idea of what we’re working with!
My absolutely favorite thing about this house are those beautiful windows on the front! I love natural light, so I can’t wait to see how gorgeous this place is in the morning. I also love how it has both a front and back patio and can totally picture us drinking coffee (ok…and maybe our Break Time sodas) here.
When you first walk into the front door, you walk into a little entry way and then directly into the living room with the dining room at the back of that space. There are stairs on the right which take you downstairs to the basement.
Past the stairs on the right hand side is the kitchen. We will basically be tripling our the counter space and doubling our cabinet storage, so now we will have plenty of room for our wedding gifts that are currently being stored in our cabinets, laundry room, and coat closet.
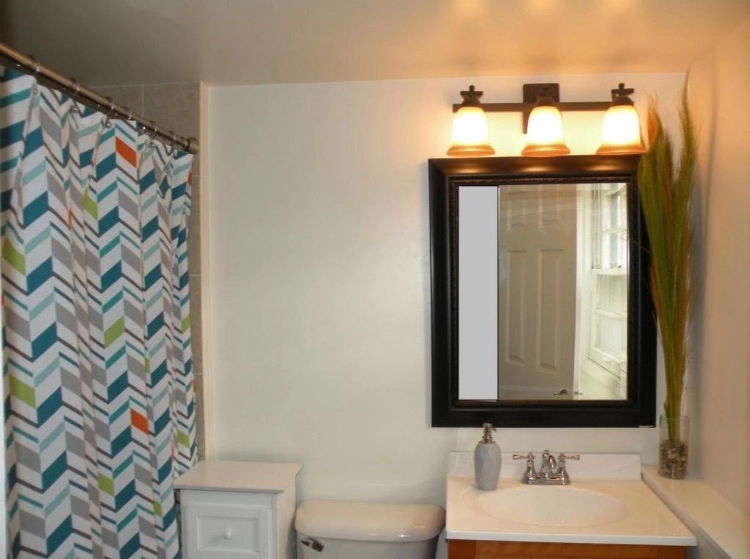
On the opposite side of the house from the kitchen, there are two bedrooms and a full bathroom. The larger room of the two will be our Master bedroom and then the smaller one will be my craft room (heart eye emojis).
One of the things that I find the most interesting about this house, that we didn’t know about until the inspection, is that we have a laundry chute in our closet! It pops right downstairs into our laundry room. Best believe we will be taking advantage of that!
Here is the soon-to-be craft room! Ideally, it will be set up in a similar way with the twin bed and then the desk under the window on the right-hand side of this photo.
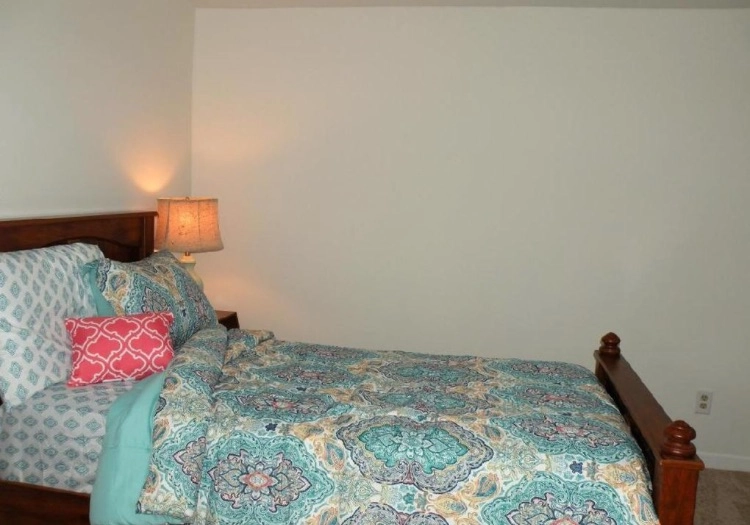
When you walk down the stairs, there is a bedroom directly to the right, and that is going to be the guest bedroom! We love the recessed lighting in this room and the windows (which are right behind the photographer) are really neat and completely make the room.
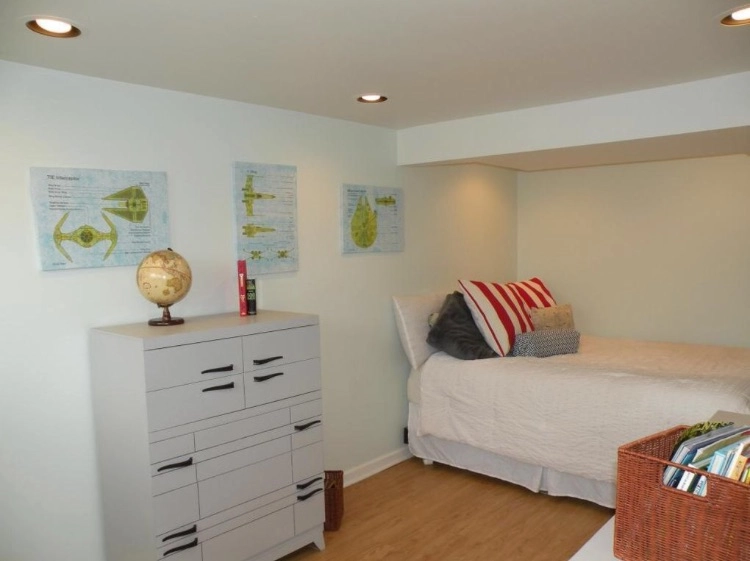
Across the hall, past these cute built ins, is the other full bath.
This room is down the hall a little more and will be Kevin’s office – I’m excited for him to have a space!
Finally, this is the family room where the TV will be! We can’t wait to watch MU games down here!
Last is Chloe’s favorite part of the house – our backyard. We’ve been hanging out and painting and Chloe has been thoroughly enjoying chasing squirrels up the trees and rolling in the grass!
So there you have it, our cute little 1958 #HighridgeRanch! We are so excited to move in and decorate to our hearts content! I’ll be posting more as we go, and I’m taking you along for the ride! So stay tuned!

About
Hi, I'm Jacqueline - believer, learner, and all around hobby enthusiast. I'm married to my highschool sweetheart, Kevin, and we live in the midwest with our sweet pup.
On this blog I share all kinds of things about my life - from my faith journey to the garden in my neighbors backyard. I've been blogging for almost eight years and use this space as a way to document my daily life.
Thanks for stopping by my little corner of the internet.